
Zipper Pouch Tutorial: A Beginner’s Guide
Embark on a delightful sewing journey! This tutorial unveils the art of crafting zipper pouches‚ perfect for beginners seeking a rewarding and practical project.
Discover how to transform fabric scraps into stylish and functional pouches‚ ideal for organizing essentials or gifting handmade treasures.
Learn essential techniques‚ from zipper insertion to creating boxed corners‚ empowering you to customize pouches to your desired size and aesthetic.
Zipper pouches represent a fantastic entry point into the world of sewing‚ offering a manageable yet satisfying project for beginners. These versatile accessories are incredibly useful for organization‚ whether it’s corralling pens and pencils for school‚ safeguarding jewelry during travel‚ or simply keeping small essentials tidy.
Historically‚ pouches have served practical purposes for centuries‚ evolving from simple drawstring bags to more secure‚ zippered versions. Today‚ they’ve experienced a resurgence in popularity‚ fueled by the maker movement and a desire for personalized accessories.
The beauty of a zipper pouch lies in its simplicity. With just a few basic sewing tools and readily available materials‚ you can create a custom pouch tailored to your specific needs and style. From vibrant quilted fabrics to durable waterproof materials‚ the possibilities are endless. This tutorial will guide you through each step‚ ensuring a successful and enjoyable sewing experience. Embrace the creativity and practicality of zipper pouch making!
Why Make Your Own Zipper Pouch?
Creating your own zipper pouch offers a multitude of benefits beyond simply having a functional accessory. Firstly‚ it’s an incredibly cost-effective alternative to purchasing pre-made pouches‚ especially considering the wide range of fabric options available‚ including utilizing scraps you may already possess.
Furthermore‚ crafting allows for complete customization; You have full control over the size‚ shape‚ fabric choice‚ and embellishments‚ resulting in a truly unique item reflecting your personal style. This is particularly appealing for those seeking specific dimensions or designs not readily found in stores.

Beyond the practical and aesthetic advantages‚ sewing a zipper pouch is a fantastic way to develop and refine your sewing skills. It’s an excellent project for mastering zipper insertion‚ straight stitching‚ and creating clean‚ professional finishes. Plus‚ it’s a sustainable practice‚ reducing reliance on mass-produced goods and potentially repurposing materials‚ contributing to a more eco-conscious lifestyle. Enjoy the satisfaction of a handmade creation!

Materials Needed
Gather your supplies: fabric (inner and outer)‚ a zipper‚ scissors‚ pins‚ a sewing machine‚ thread‚ and an iron. Essential tools ensure a smooth crafting experience!
Fabric Selection for Your Pouch
Choosing the right fabric is crucial for both the aesthetic and durability of your zipper pouch. Consider the intended use – a pencil case demands sturdier material than a delicate cosmetics bag. Cotton is a fantastic beginner-friendly option‚ offering ease of sewing and a wide array of prints.
For increased durability‚ explore canvas‚ denim‚ or even repurposed materials like old jeans! These heavier fabrics provide structure and resilience. Quilted fabric‚ as seen in some tutorials‚ adds a unique texture and a touch of warmth.
Don’t forget the lining! A smooth fabric like cotton poplin or satin will protect the contents and give a professional finish. Scraps are perfect for pouches‚ reducing waste and encouraging creativity. Waterproof fabrics‚ like PUL‚ are ideal for pouches intended to hold wet items. Remember to pre-wash your fabrics to prevent shrinkage after construction!
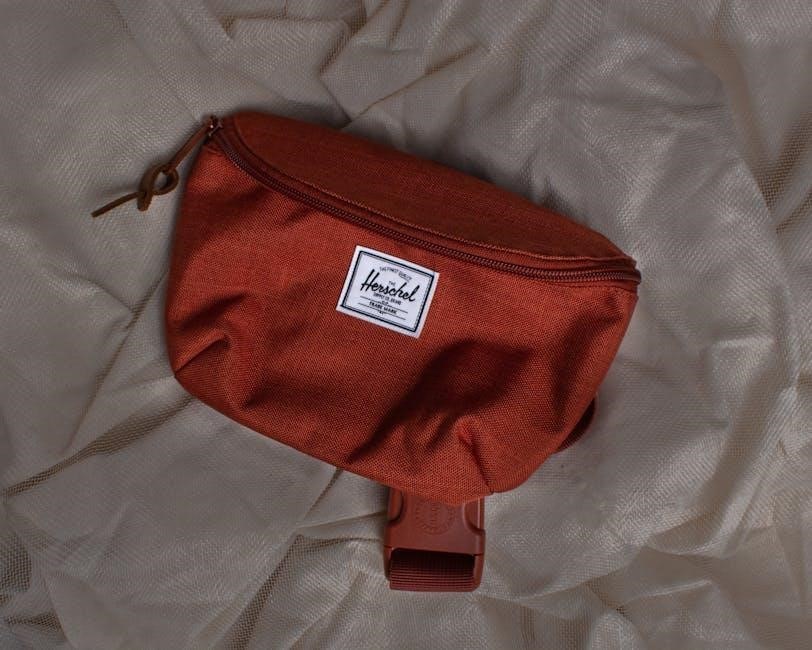
Zipper Options: Sizes and Types
Zippers come in a surprising variety! Understanding your options is key to a successful pouch. Standard zippers are the most common‚ available in numerous lengths – choose one slightly longer than your pouch opening for easier sewing. Nylon coil zippers are flexible and easy to install‚ making them ideal for beginners.
Metal zippers offer a more robust and classic look‚ but can be trickier to sew. Invisible zippers create a seamless finish‚ but require more precision. Consider the size – a #3 or #5 zipper is generally suitable for small to medium pouches.

Separating zippers can be used for unique pouch designs. Two-way zippers allow for versatile opening options. Don’t be afraid to experiment with colors and finishes to add a personal touch! Ensure the zipper teeth are consistent and smooth before purchasing for a hassle-free sewing experience.
Essential Sewing Tools
Gathering the right tools streamlines the zipper pouch creation process. A sewing machine is highly recommended‚ though hand-sewing is possible for patient crafters. Sharp fabric scissors are crucial for precise cutting. A rotary cutter and mat offer accuracy‚ especially for straight lines.
Pins or fabric clips hold layers securely during sewing. A seam ripper is your best friend for correcting mistakes – everyone makes them! Measuring tape and ruler ensure accurate dimensions. Iron and ironing board are vital for crisp‚ professional finishes.
Zipper foot for your sewing machine is essential for close-to-the-teeth stitching. Hand sewing needles are useful for finishing touches. Thread matching your fabric color blends seamlessly. A marking pen or chalk helps transfer pattern pieces. Having these tools readily available will make your project enjoyable!
Step-by-Step Construction
Now‚ let’s build your pouch! We’ll guide you through cutting fabric‚ skillfully attaching the zipper using the sandwich method‚ and precisely sewing it in place.
Finally‚ we’ll create those lovely boxed corners for added space and a professional finish – let’s begin the sewing adventure!
Cutting the Fabric Pieces
Precise cutting is foundational for a neat zipper pouch. Begin by determining your desired pouch dimensions – consider its intended use‚ whether for pens‚ cosmetics‚ or jewelry.
Typically‚ you’ll need two fabric pieces for the exterior and two for the lining‚ plus a piece for the zipper facing. Add seam allowances – usually ¼ inch – to all sides of each piece.
For a boxed corner pouch‚ the fabric pieces will be rectangular. The width determines the pouch’s height‚ and the length dictates its width. To create the boxed corners (gussets)‚ the length needs to be double the desired base width.
Carefully cut the fabric using sharp scissors or a rotary cutter and mat. Accuracy is key! Double-check your measurements before cutting to avoid errors. A well-cut foundation ensures a smooth construction process and a professional-looking finished product. Don’t rush this step!
Remember to label your pieces (e.g.‚ “Exterior Front‚” “Lining Back”) to avoid confusion during assembly. This simple step can save you time and frustration later on.

Attaching the Zipper: The Sandwich Method
The “sandwich method” is a beginner-friendly technique for attaching zippers. Begin by placing the zipper face down on the wrong side of one exterior fabric piece. Align the zipper tape with the raw edge of the fabric.
Next‚ place one lining fabric piece right side up on top of the zipper and the exterior fabric‚ creating a “sandwich.” Ensure all layers are aligned neatly. Pin the layers together securely‚ focusing on the zipper tape.
Using a zipper foot on your sewing machine‚ stitch along both sides of the zipper tape‚ close to the teeth. This secures the zipper to the fabric layers. Backstitch at the beginning and end of each seam for reinforcement.
Repeat this process with the remaining exterior and lining fabric pieces on the other side of the zipper. This creates a complete sandwich with the zipper securely nestled between the fabric layers.
Press the fabric away from the zipper teeth for a clean finish. This method provides a neat and stable zipper application‚ perfect for beginners.
Sewing the Zipper in Place
Now that the zipper is sandwiched between the fabric‚ it’s time to secure it with precise stitching. Using your sewing machine and a zipper foot‚ begin stitching along the bottom edge of the zipper tape‚ close to the zipper teeth.
Maintain a consistent seam allowance – typically ¼ inch – throughout the entire process. Backstitch at the beginning and end of each seam to prevent unraveling and ensure durability. Carefully navigate the zipper pull with your machine.
Slowly and steadily‚ continue stitching along both sides of the zipper tape‚ creating a secure attachment to the fabric. Take your time‚ especially around curves or corners‚ to maintain a neat and even seam.
Once both sides are sewn‚ gently pull the fabric away from the zipper. Inspect the stitching to ensure it’s secure and consistent. Trim any excess threads for a clean finish.
This careful sewing process establishes a strong foundation for your zipper pouch‚ ensuring the zipper functions smoothly and reliably.
Creating the Boxed Corners (Gusset)
To give your zipper pouch a professional‚ boxed shape‚ we’ll create gusseted corners. With the pouch right-side out‚ flatten one of the bottom corners‚ aligning the side seam with the bottom seam to form a triangle.

Measure from the point of the triangle down the side seam – typically 1 to 1.5 inches‚ depending on your desired pouch depth. Mark this measurement with a fabric marker or pins. Draw a straight line across the triangle at your marked measurement.
Carefully stitch along this line‚ reinforcing the stitching with a backstitch at both ends. Repeat this process on the other bottom corner.
Trim away the excess fabric from the corners‚ leaving approximately ¼ inch seam allowance. This reduces bulk and creates clean‚ defined corners. Turn the pouch right-side out‚ and gently push out the corners to reveal the boxed shape.
These boxed corners not only enhance the pouch’s aesthetic but also provide extra space and stability.

Finishing Touches
Now‚ refine your creation! Turn the pouch right-side out‚ press for a crisp finish‚ and consider adding a lining for durability. Embellish with charms!
Turning and Pressing the Pouch
Carefully turn your nearly-finished zipper pouch right-side out through the opening left in the lining (if you added one) or through the zipper opening itself. This can sometimes be a little snug‚ so use a point turner or a blunt tool – like a chopstick – to gently coax out the corners. Avoid anything too sharp that could damage the fabric or zipper.
Once fully turned‚ take a moment to admire your work! Now‚ the magic of pressing comes into play. Use an iron on a suitable setting for your chosen fabric. Press the pouch firmly‚ paying special attention to the seams and corners. A well-pressed pouch looks infinitely more polished and professional.
Focus on pressing the zipper area flat‚ ensuring the teeth are nicely defined. For the corners‚ gently press them into shape‚ creating a clean‚ boxed look. Pressing helps to set the stitches and gives the pouch a more structured and finished appearance. This step is crucial for achieving a high-quality result‚ transforming your project from good to great!
Adding a Lining (Optional)
While not essential‚ a lining elevates your zipper pouch‚ providing a cleaner finish and added durability. Cut your lining fabric to the same dimensions as your outer fabric pieces. Use a contrasting color or pattern for a delightful surprise inside!
With right sides together‚ sew the lining pieces together‚ mirroring the construction of the outer pouch – leaving a 3-4 inch opening for turning. Remember to backstitch at the beginning and end of your seams. This opening will be used to turn the pouch right-side out.
Place the outer pouch (right side out) inside the lining (wrong side out). Align the top edges and carefully pin around the zipper. Now‚ sew the lining to the outer pouch along the top edge‚ securing everything in place. Push the lining through the opening you left‚ and carefully close it with hand stitches for an invisible finish. A lining adds a professional touch and protects your pouch’s contents!
Decorative Embellishments
Now for the fun part – personalizing your creation! Decorative embellishments transform a simple zipper pouch into a unique statement piece. Consider fabric paint for custom designs‚ or iron-on patches for a playful touch.
Embroidered details add a handcrafted charm. Simple stitches can outline shapes or create floral motifs. Beads and sequins offer a touch of sparkle and texture. Don’t be afraid to experiment with different materials and techniques!
Ribbon or lace trims along the zipper or pouch edges provide a delicate finish. Appliqué shapes cut from contrasting fabrics add visual interest. Remember to securely attach all embellishments to prevent them from detaching with use. Let your creativity flow and make your zipper pouch truly your own – a reflection of your personal style and artistic flair!
Advanced Techniques
Elevate your skills with innovative zipper applications and explore diverse pouch designs. Experiment with different shapes‚ sizes‚ and closures for unique creations!
Master complex techniques to unlock limitless possibilities in zipper pouch crafting.
Using Different Zipper Applications
Beyond the standard insertion‚ numerous zipper applications can dramatically enhance your pouch designs. Consider exploring invisible zippers for a sleek‚ professional finish‚ concealing the zipper teeth entirely within the fabric. This technique requires precision but yields a beautifully refined look.
Alternatively‚ exposed zippers offer a bold‚ industrial aesthetic‚ often used with colorful or metallic zippers to create a statement piece. You can also experiment with two-way zippers‚ allowing for versatile opening options and easier access to contents.
For a unique touch‚ try incorporating zipper trims or embellishments‚ such as ribbons‚ beads‚ or charms‚ directly onto the zipper tape. This adds personality and visual interest. Furthermore‚ consider using continuous zippers – a single‚ long zipper that wraps around the entire pouch‚ creating a distinctive and functional design. Don’t be afraid to combine different zipper types within a single project for a truly customized creation!
Remember to adjust your sewing techniques based on the chosen zipper application‚ ensuring a secure and aesthetically pleasing result.
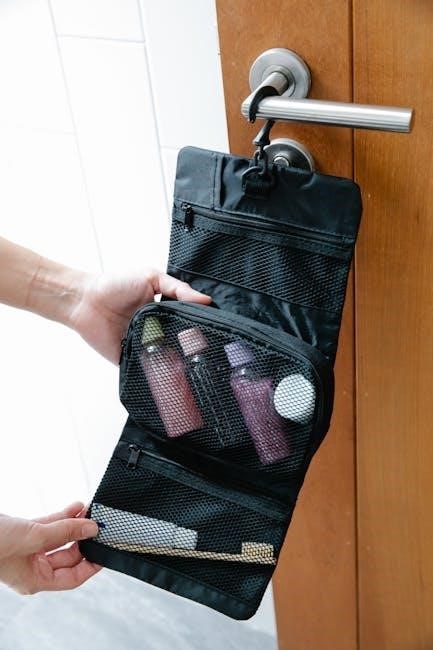
Exploring Various Pouch Sizes and Shapes
Once you’ve mastered the basic zipper pouch construction‚ unleash your creativity by experimenting with diverse sizes and shapes! Small pouches are perfect for coins‚ keys‚ or earbuds‚ while larger versions can accommodate makeup‚ toiletries‚ or even small electronics.
Beyond rectangular pouches‚ explore rounded corners for a softer aesthetic or create a trapezoid shape for a unique‚ modern look. Boxed pouches‚ featuring gussets at the bottom‚ offer increased capacity and stability. Consider tall‚ slim pouches ideal for pens and pencils‚ or wide‚ flat pouches for organizing flat items;
Don’t limit yourself to traditional designs! Experiment with asymmetrical shapes‚ patchwork constructions‚ or even pouches with multiple compartments. Adjust your fabric cutting and sewing techniques accordingly to achieve your desired form. Remember to consider the intended use of the pouch when determining its size and shape‚ ensuring it meets your practical needs and stylistic preferences.
The possibilities are truly endless – let your imagination guide you!
