

Lux Thermostat Instruction Manual: A Comprehensive Guide
Welcome! This manual provides detailed instructions for installing, operating, and troubleshooting your Lux thermostat, ensuring optimal home comfort and energy savings.
Lux thermostats, including the Kono Smart, TX500U, and TX9600TS models, offer a blend of affordability and functionality, now enhanced with Matter compatibility.
Whether you’re setting schedules, utilizing geofencing, or simply adjusting the temperature, this guide will walk you through every step of the process.
Lux thermostats represent a commitment to providing accessible and reliable home comfort solutions. For years, Lux has been a trusted name, offering a diverse range of models – from basic programmable options like the TX500U to advanced smart thermostats such as the Kono.
These thermostats are designed to seamlessly integrate into your life, offering precise temperature control and potential energy savings. The newest generation builds upon the universal smart home standard, Matter, simplifying setup and ensuring compatibility with major smart home assistants.
Lux aims to bridge the gap between functionality and affordability, offering a smart solution for every home.
Understanding Lux Thermostat Models
Lux offers a variety of thermostats to suit different needs and budgets. The Lux Kono Smart Thermostat stands out with its Matter compatibility, promising easy setup and seamless integration with popular smart home ecosystems. For those seeking a reliable, programmable option, the Lux TX500U delivers essential features at an affordable price point.

The Lux TX9600TS provides a solid middle ground, offering features like geofencing without the complexities of a fully “smart” device. Understanding these distinctions will help you maximize your thermostat’s potential.
Lux Kono Smart Thermostat
The Lux Kono Smart Thermostat represents a modern approach to home climate control, blending affordability with intelligent features. Built on the Matter platform, it simplifies setup and ensures compatibility with major smart home assistants like Amazon Alexa, Google Assistant, and Apple HomeKit.
This model allows for remote control via the Lux app, offering convenience and energy savings. Its design prioritizes user-friendliness, making it an excellent choice for those new to smart home technology, while still delivering powerful performance.
Lux TX500U Programmable Thermostat
The Lux TX500U stands out as a highly recommended, affordable programmable thermostat option. It bridges the gap between traditional and smart thermostats, offering essential features without the complexities of full smart home integration. Available at retailers like Amazon and Home Depot for around $30, the TX500U provides reliable temperature control and scheduling capabilities.
This model is ideal for users seeking a straightforward, effective solution for managing their home’s heating and cooling, offering a solid middle ground for comfort and efficiency.
Lux TX9600TS Thermostat
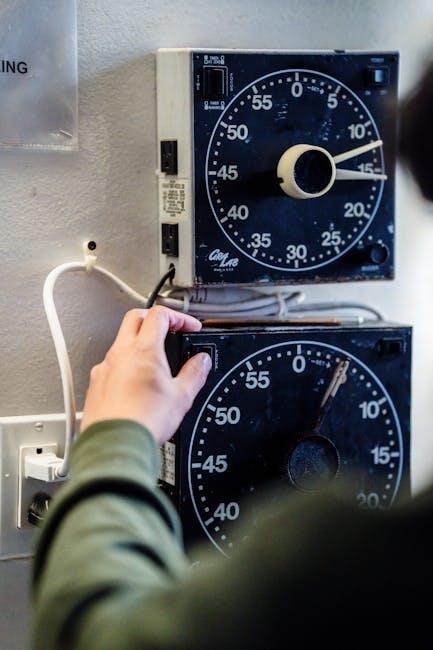
The Lux TX9600TS thermostat is designed for ease of manual control, allowing users to effortlessly adjust temperature set-points, heating/cooling schedules, and utilize home/away and vacation features. While testing indicates similar performance to other Lux models, specific price points and feature availability may vary.
This thermostat prioritizes a user-friendly experience, offering direct control over your home’s climate without requiring complex smart home integrations or app-based management. It’s a reliable choice for straightforward temperature regulation.
Initial Setup and Installation
Before beginning, ensure you’ve carefully reviewed all safety precautions. Proper installation is crucial for optimal performance and longevity of your Lux thermostat. The initial steps involve verifying all components are present within the package – a complete list is provided separately.
Next, securely mount the thermostat base to the wall, followed by meticulous wiring according to your existing HVAC system’s configuration. Double-check all connections before proceeding to power on the device.
Checking Package Contents
Upon opening your Lux thermostat package, carefully verify the inclusion of all listed components. You should find the thermostat unit itself, a mounting base plate, screws and wall anchors for secure installation, and wire labels for simplified wiring.
Additionally, confirm the presence of a detailed instruction manual – this very document! – and potentially, depending on the model, a quick start guide. If any items are missing, immediately contact Lux Support for assistance before proceeding with installation.
Mounting the Thermostat Base
Before wiring, securely mount the thermostat base plate to the wall. Begin by turning off power to your HVAC system at the breaker. Using a level, position the base plate where desired, marking screw locations. Drill pilot holes if necessary, and insert wall anchors for drywall installations.
Align the base plate with the holes, and fasten it using the provided screws. Ensure the base is firmly attached to the wall, providing a stable foundation for the thermostat unit itself.
Wiring the Thermostat
With the power OFF, carefully connect the wires to the corresponding terminals on the thermostat base. Refer to the wiring diagram included with your Lux thermostat and your existing thermostat’s wiring. Typically, wires are labeled with letters like R, C, W, Y, and G.
Securely insert each wire into its designated terminal, ensuring a firm connection. Double-check all connections against the diagram before proceeding. Incorrect wiring can damage your HVAC system or the thermostat.
Connecting to Wi-Fi (Smart Models)
For Lux Kono Smart thermostats, connecting to Wi-Fi unlocks remote control and advanced features. Begin by downloading the Lux app from the App Store (iOS) or Google Play Store (Android). Once installed, create an account or log in.
Follow the in-app instructions to pair your thermostat. The app will guide you through selecting your Wi-Fi network and entering your password. Ensure a strong Wi-Fi signal for a stable connection. Matter compatibility simplifies this process!
Downloading the Lux App
To harness the smart features of your Lux thermostat, the first step is downloading the official Lux app. This application serves as your central hub for remote control and advanced settings.
For iOS users, visit the Apple App Store and search for “Lux Smart Home.” Android users should head to the Google Play Store and perform the same search. Locate the app developed by Lux Products and tap “Install.”
The app is free to download and requires a compatible smartphone or tablet.
Pairing the Thermostat with the App
Once the Lux app is installed, open it and create an account or log in if you already have one. Ensure your thermostat is powered on and in pairing mode – consult the initial setup section if needed.
Within the app, select “Add Device” and follow the on-screen prompts. The app will search for nearby Lux thermostats. Select your thermostat from the list when it appears.
You may be asked to enter your Wi-Fi credentials during this process, enabling seamless control.
Basic Operation and Control

Your Lux thermostat offers intuitive control over your home’s climate. To adjust the temperature, use the up and down arrows on the thermostat’s display or within the Lux app. The current setpoint is prominently displayed.
Switching between heating and cooling modes is typically done via a “Mode” button on the thermostat or through the app’s interface. Select “Heat” for warming, “Cool” for cooling, or “Auto” for automatic switching based on temperature.
Manual overrides are easily implemented for immediate comfort adjustments.
Setting the Temperature
Adjusting your desired temperature is straightforward. Utilize the physical up and down arrow buttons located on the thermostat’s faceplate for precise control. Alternatively, access the temperature setting directly within the Lux mobile application for remote adjustments.
The current set temperature is clearly visible on the display, providing immediate feedback. The ease of manually controlling the temperature set-point is a key feature.
Fine-tune your comfort levels with incremental adjustments, ensuring optimal climate control.
Switching Between Heating and Cooling Modes
Seamlessly transition between heating and cooling modes to maintain year-round comfort. On most Lux models, a dedicated “Mode” button allows you to cycle through options: Heat, Cool, Auto, and Off. The current mode is prominently displayed on the thermostat screen.

Within the Lux app, you can also easily select your preferred mode remotely.
The “Auto” mode intelligently switches between heating and cooling to maintain your set temperature, optimizing energy efficiency and comfort levels.
Programming Schedules
Maximize energy savings and comfort by programming personalized heating and cooling schedules. Lux thermostats offer flexible scheduling options to match your lifestyle. You can create distinct daily schedules with different temperature settings for various times of the day – wake, leave, return, and sleep.
For varied weekly routines, utilize the 7-day programming option, customizing each day individually.
Access scheduling features directly on the thermostat or conveniently through the Lux mobile app for remote control and adjustments.
Creating a Daily Schedule
To establish a daily schedule, navigate to the programming section on your Lux thermostat. Define specific time periods – typically wake, leave, return, and sleep – and assign a desired temperature for each. The thermostat will automatically adjust the temperature based on this programmed timeline.
Ensure accurate time settings for proper schedule execution. You can easily modify existing time periods or add new ones to refine your comfort preferences. Utilize the app for simplified schedule creation and management.
Using the 7-Day Programming Option
For customized comfort, leverage the 7-day programming feature. This allows you to create unique schedules for each day of the week, accommodating varying routines. Perhaps weekdays require energy-saving settings while weekends prioritize comfort. Access this option within the thermostat’s programming menu.
Copy existing daily schedules to streamline setup, then fine-tune individual days as needed. The Lux app provides a user-friendly interface for managing these complex schedules, ensuring optimal temperature control throughout the week.
Advanced Features
Unlock enhanced control with Lux thermostat’s advanced capabilities. Geofencing automatically adjusts temperatures based on your location, saving energy when you’re away and ensuring comfort upon arrival. This feature utilizes your smartphone’s location services for seamless operation.
Furthermore, Lux thermostats are increasingly embracing Matter compatibility, a universal smart home standard. This ensures effortless integration with major smart home assistants, simplifying control and expanding your smart home ecosystem. Enjoy a connected and responsive home environment.
Geofencing Functionality
Lux thermostats’ geofencing feature offers convenient, automated temperature control. By utilizing your smartphone’s location, the thermostat detects when you leave or approach your home. This triggers pre-set temperature adjustments, maximizing energy savings while you’re away and ensuring a comfortable environment upon your return.
Configure geofencing within the Lux app, defining a virtual boundary around your home. The thermostat then intelligently responds to your movements, providing a truly “smart” and responsive heating and cooling experience, without manual adjustments.
Matter Compatibility
Lux thermostats are now built on Matter, a groundbreaking universal smart home standard. This ensures seamless connectivity and interoperability with a wide range of smart home devices and platforms, including major smart home assistants. Matter simplifies setup, eliminating compatibility concerns and streamlining the integration process.
Enjoy effortless control and automation across your entire smart home ecosystem. Matter provides a more reliable and secure experience, allowing your Lux thermostat to work harmoniously with other Matter-enabled products.
Troubleshooting Common Issues
Experiencing problems with your Lux thermostat? This section addresses frequent concerns. If the thermostat isn’t powering on, check wiring and power supply. For Wi-Fi connection issues, ensure correct network details and router functionality. Inaccurate temperature readings may indicate improper placement or calibration needs.
Refer to the error code section for specific diagnostics. Simple solutions often resolve these issues, but if problems persist, consult the warranty information or contact Lux support for assistance.
Thermostat Not Powering On

If your Lux thermostat displays no power, begin by verifying the wiring connections at the thermostat base and your HVAC system. Ensure the power switch to your HVAC system is turned on. Check the circuit breaker to confirm it hasn’t tripped.
If using batteries, replace them with fresh ones. A loose wire or a blown fuse could also be the culprit. If these steps don’t resolve the issue, contact a qualified HVAC technician for further assistance.
Wi-Fi Connection Problems
Experiencing Wi-Fi connectivity issues with your Lux Smart thermostat? First, confirm your home Wi-Fi network is functioning correctly with other devices. Ensure the thermostat is within range of your router. Restart both your router and the thermostat.
Double-check you’ve entered the correct Wi-Fi password within the Lux app during the pairing process. Matter compatibility simplifies setup, but a stable internet connection is still crucial for seamless operation and remote control.
Inaccurate Temperature Readings
If your Lux thermostat displays an incorrect temperature, several factors could be at play. Avoid placing the thermostat in direct sunlight, near drafts, or close to heat-generating appliances. These can skew readings. Verify the thermostat is securely mounted to the wall, ensuring proper airflow around the device.
Calibrate the temperature within the Lux app if a consistent offset exists. Remember, accurate readings are vital for efficient heating and cooling, maximizing comfort and energy savings.
Understanding Error Codes

Lux thermostats utilize error codes to diagnose system issues. While specific codes vary by model (Kono Smart, TX500U, TX9600TS), a flashing display generally indicates a problem. Consult the detailed error code list within the Lux app or the complete manual available online.
Common errors relate to wiring, sensor malfunctions, or communication failures. Note the code, then attempt basic troubleshooting like power cycling. If the error persists, contact Lux support for assistance, providing the error code for faster resolution.
Battery Replacement
Your Lux thermostat may utilize batteries for backup or primary power, depending on the model (Kono Smart, TX500U, TX9600TS). Low battery warnings will appear on the display. To replace, carefully open the thermostat’s battery compartment – typically located on the side or back.
Insert new alkaline batteries, observing correct polarity (+ and -). Ensure a snug fit. Battery life varies with usage and model. Regular replacement safeguards against unexpected temperature control loss and maintains programmed schedules.
Resetting the Thermostat
Resetting your Lux thermostat (Kono Smart, TX500U, or TX9600TS) restores it to factory default settings, erasing personalized schedules and Wi-Fi connections. This is useful for troubleshooting or preparing the device for a new user. The reset process varies by model; consult the specific instructions for your thermostat.
Typically, a small recessed button requires a pin or paperclip to hold for 10-15 seconds. Confirm the reset by observing the display returning to its initial setup screen. Remember to re-pair with the Lux app if applicable.
Safety Precautions

Important Safety Information: Disconnect power to your HVAC system at the breaker box before installing or servicing your Lux thermostat (Kono Smart, TX500U, TX9600TS). Improper wiring can damage the thermostat or your HVAC equipment, potentially causing a fire hazard.
Do not expose the thermostat to excessive moisture or extreme temperatures. Installation should be performed by a qualified technician if you are unfamiliar with electrical wiring. Always follow local electrical codes and regulations during installation and operation.
Warranty Information
Lux Thermostat Warranty: Lux Products warrants its thermostats (including Kono Smart, TX500U, and TX9600TS models) against defects in materials and workmanship for a period of one (1) year from the date of purchase. This warranty covers repair or replacement of the defective product, at Lux’s discretion.
This warranty does not cover damage caused by improper installation, misuse, abuse, or acts of God. Proof of purchase is required for all warranty claims. Contact Lux Support for warranty service details and claim procedures.
Contacting Lux Support
Need Assistance? For technical support, troubleshooting, or warranty claims regarding your Lux thermostat (Kono Smart, TX500U, TX9600TS, or other models), Lux Products offers several convenient contact options.
Visit the official Lux Products website for a comprehensive FAQ section and access to downloadable resources. You can also reach their customer support team via phone or email. Detailed contact information, including operating hours, is available on their website’s support page.
Frequently Asked Questions (FAQ)
Q: Can I control my Lux thermostat remotely? A: Yes, Lux Kono Smart thermostats offer remote control via the Lux app, allowing temperature adjustments from anywhere with an internet connection. Other models may have limited remote access.
Q: Is the Lux thermostat compatible with my HVAC system? A: Most standard 24V HVAC systems are compatible. However, it’s crucial to verify compatibility before installation, especially with heat pumps or multi-stage systems. Consult the Lux website or support for details.
Can I control my Lux thermostat remotely?
Yes! The Lux Kono Smart thermostat is specifically designed for remote access and control. Utilizing the dedicated Lux app, available for iOS and Android devices, you can adjust your home’s temperature from virtually anywhere with an active internet connection.
This feature provides convenience and potential energy savings, allowing you to optimize your home climate even when you’re away. Other Lux models may offer limited remote capabilities or require a hub.
Is the Lux thermostat compatible with my HVAC system?
Generally, yes! Lux thermostats are designed to work with most standard 24V heating and cooling systems, including furnaces, air conditioners, heat pumps, and boilers. However, compatibility can vary.
It’s crucial to verify your system’s voltage and wiring configuration before installation. Systems with high-voltage wiring (110V or 220V) are not compatible. Consult a qualified HVAC technician if you’re unsure about your system’s compatibility.