
Golden Curry Instructions: A Comprehensive Guide
Embark on a flavorful journey with Golden Curry! This guide details preparation, cooking methods—stovetop, Instant Pot, and slow cooker—and serving suggestions for a delightful experience.
Explore diverse recipes featuring chicken, pork, or beef, alongside essential vegetables like onions and carrots, ensuring a perfectly balanced and satisfying meal every time.
Discover how to adjust spice levels and troubleshoot common issues, guaranteeing a consistently delicious Golden Curry dish tailored to your preferences and culinary expertise.
Understanding Golden Curry
Golden Curry, a beloved staple in Japanese cuisine, offers a uniquely comforting and flavorful experience. It’s more than just a meal; it’s a versatile dish adaptable to various tastes and dietary preferences. The foundation of this culinary delight lies in the roux, a pre-made block containing curry powder, flour, oil, and other seasonings, simplifying the cooking process significantly.
Its appeal stems from its balanced flavor profile – a harmonious blend of savory, slightly sweet, and subtly spicy notes. This makes it incredibly approachable, even for those unfamiliar with Japanese curry. The ease of preparation, coupled with its rich taste, explains its widespread popularity, both in Japan and internationally.
Understanding the core components – the roux, the protein, and the vegetables – is key to mastering this dish. Whether you’re a seasoned chef or a beginner cook, Golden Curry provides a rewarding and delicious culinary adventure.
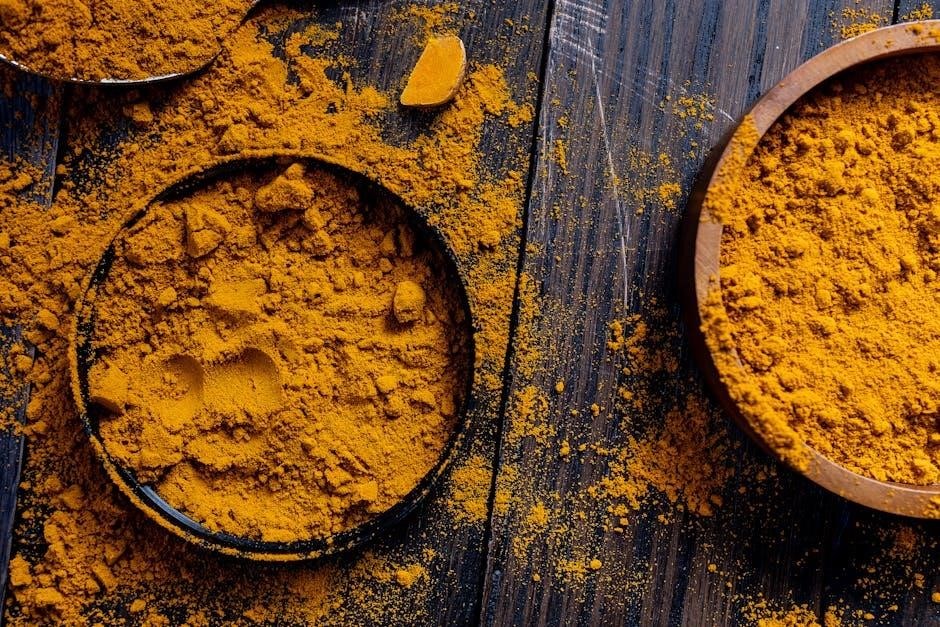
What is Golden Curry?
Golden Curry is a Japanese curry roux produced by S&B Foods, renowned for its distinctive flavor and convenience. It’s not a pre-made curry dish, but rather a concentrated block of flavor that forms the base of a curry. This roux contains a blend of curry powder, flour, oil, and seasonings, designed to be dissolved in water and simmered with meat and vegetables.
Available in varying levels of spiciness – mild, medium hot, and hot – Golden Curry caters to a wide range of palates. The roux’s texture is smooth, creating a rich and velvety sauce when cooked. It’s incredibly versatile, pairing beautifully with chicken, pork, beef, or even vegetarian options.
Essentially, Golden Curry provides a shortcut to authentic Japanese curry, allowing home cooks to achieve restaurant-quality results with minimal effort. It’s a pantry staple for many, celebrated for its consistent quality and delicious taste.
History and Origins of S&B Golden Curry
S&B Golden Curry traces its roots back to 1925, when Nagatani Shoten, now S&B Foods, began selling curry powder in Japan. This introduction coincided with Japan’s embrace of curry, initially adopted from the British during the Meiji era. Recognizing a demand for convenience, S&B revolutionized curry preparation in 1926 by launching Japan’s first commercially available curry roux.
This roux simplified the cooking process, eliminating the need to blend spices from scratch. Golden Curry quickly gained popularity, becoming a household name synonymous with Japanese curry. Over the decades, S&B continued to innovate, refining the recipe and expanding the product line to include various spice levels and formats.
Today, S&B Golden Curry remains the leading curry roux in Japan, a testament to its enduring quality and cultural significance. It represents a blend of tradition and innovation, continuing to delight generations of curry lovers.
Types of Golden Curry Available
S&B Golden Curry offers a diverse range to suit every palate. The Mild variety is perfect for those sensitive to spice, providing a gentle, flavorful experience. Medium Hot is the most popular choice, offering a balanced warmth that appeals to a broad audience.
For spice enthusiasts, Hot delivers a significant kick, while Extra Hot provides an intense, fiery sensation. Beyond heat levels, Golden Curry also comes in different formats. The classic block roux is widely available, alongside convenient ready-to-use curry sauces.
Furthermore, specialized options like Ichiban, known for its richer flavor, and variations featuring different vegetable blends cater to specific preferences. Recent additions include limited-edition flavors, showcasing regional Japanese curry styles, ensuring there’s a Golden Curry for everyone.

Preparing the Ingredients
Gather fresh vegetables – onions, carrots, and potatoes are key! Select your preferred protein: chicken, pork, or beef, cut into bite-sized pieces for optimal cooking and enjoyment.
Ensure you have boiling water and a touch of neutral oil ready to begin the flavorful transformation into a comforting Golden Curry masterpiece.
Essential Vegetables for Golden Curry
Golden Curry truly shines with a carefully selected vegetable base. Onions are fundamental, providing a sweet and savory foundation when sautéed until translucent and softened – finely chopped is best for even distribution of flavor. Carrots add a touch of sweetness and vibrant color, sliced to ensure they cook through and become tender.
While not always included, potatoes are a popular addition, offering a hearty texture and absorbing the rich curry sauce beautifully. Consider using Yukon Gold or Russet varieties. Celery can also contribute a subtle depth of flavor, though it’s less traditional. Don’t hesitate to experiment with other additions like bell peppers or mushrooms for a personalized touch!
Remember, the quality of your vegetables directly impacts the final flavor profile, so choose fresh, firm produce for the most delicious results. Proper preparation – chopping and slicing – is crucial for even cooking and a harmonious blend of tastes.
Protein Choices: Chicken, Pork, and Beef
Golden Curry is remarkably versatile, pairing wonderfully with various proteins. Chicken thighs are a popular choice, offering rich flavor and remaining tender during simmering. Pork shoulder, similarly, becomes incredibly succulent and falls apart easily, absorbing the curry’s essence. For a bolder flavor, beef is an excellent option; chuck roast or stew meat works best, requiring longer cooking times to achieve tenderness.
Consider the cut of meat – those with some marbling will yield a more flavorful result. Browning the protein before adding it to the curry base is key, developing a delicious crust and adding depth. Pre-cut, bite-sized pieces are convenient, but larger cuts can be used and broken down during the simmering process.
Ultimately, the best protein choice depends on your preference, but each option delivers a satisfying and flavorful Golden Curry experience.
The Role of Water and Oil
Water is fundamental to Golden Curry, acting as the base for the sauce and facilitating the dissolving of the roux. The amount of water directly impacts the curry’s consistency – more water yields a thinner sauce, while less results in a thicker one. Typically, 2 ½ cups of boiling water are used per package, but adjustments can be made to achieve the desired texture.
Oil, usually a neutral variety, plays a crucial role in sautéing the vegetables and browning the protein. This initial step builds a flavorful foundation for the curry. The oil prevents sticking and allows for even cooking, developing those essential Maillard reaction flavors.
Don’t skimp on this step! A good sear on the meat and softened vegetables are vital for a rich, complex Golden Curry.
Optional Additions: Potatoes and Other Vegetables
Golden Curry is wonderfully versatile, lending itself to a variety of vegetable additions beyond the basics. Potatoes are a classic inclusion, adding heartiness and absorbing the flavorful sauce. They should be cut into bite-sized pieces and added during the simmering stage to ensure they cook through.
Other excellent options include celery, peas, spinach, broccoli, or even sweet potatoes. Experimenting with different vegetables allows for customization and nutritional enhancement. Consider adding root vegetables earlier in the cooking process for longer cooking times.
Don’t be afraid to get creative! Carrots are frequently used, but mushrooms, bell peppers, or even apples can contribute unique flavors. Remember to adjust cooking times based on the vegetable’s density.

Cooking Methods
Golden Curry adapts beautifully to various techniques! Explore classic stovetop instructions, quick Instant Pot recipes, and convenient slow cooker adaptations for a flavorful, satisfying meal.
Stovetop Instructions for Golden Curry
Begin by sautéing chopped onions and carrots in neutral oil until softened, creating a flavorful base. Add your chosen protein – chicken thighs, pork shoulder, or beef – and brown thoroughly for enhanced taste.
Pour in boiling water, ensuring it covers the ingredients, and bring to a simmer. Reduce heat and cook until the protein is tender, approximately 20-30 minutes.
Break the Golden Curry roux into pieces and add it to the pot, stirring continuously until completely dissolved. This is crucial for a smooth, lump-free sauce.
Continue simmering for another 10-15 minutes, allowing the curry to thicken to your desired consistency. Stir occasionally to prevent sticking. Adjust seasoning as needed, and serve hot with steamed rice!

Instant Pot Golden Curry Recipe
Start by selecting the ‘Sauté’ function on your Instant Pot. Brown your protein (chicken, pork, or beef) with chopped onions and carrots in a little oil. This builds a rich flavor base.
Add boiling water, ensuring it reaches the maximum fill line. Pressure cook on ‘Manual’ or ‘High Pressure’ for 15-20 minutes for chicken/pork, or 25-30 minutes for beef. Allow a natural pressure release for 10 minutes, then quick release any remaining pressure.
Carefully open the Instant Pot and stir in the broken Golden Curry roux pieces until fully dissolved. Select ‘Sauté’ again and simmer for 5-10 minutes to thicken the curry to your liking.
Serve immediately over rice. This method delivers a tender, flavorful curry in a fraction of the time!
Slow Cooker Golden Curry Adaptation
Begin by browning your chosen protein – chicken thighs, pork shoulder, or beef – in a skillet. This step enhances the curry’s depth of flavor. Transfer the browned protein to your slow cooker.
Add chopped onions, carrots, and any other desired vegetables to the slow cooker. Pour in the boiling water, ensuring the ingredients are mostly submerged. Cook on low for 6-8 hours, or on high for 3-4 hours, until the meat is incredibly tender.
During the last 30 minutes of cooking, break the Golden Curry roux into pieces and stir it into the slow cooker. Continue to cook until the roux is completely dissolved and the curry has thickened.
Serve hot over rice. The slow cooker method creates an exceptionally tender and flavorful curry with minimal effort!
Step-by-Step Cooking Guide
Follow these simple steps for perfect Golden Curry! Sauté vegetables, brown protein, incorporate the roux, and simmer until thickened—creating a rich, flavorful, and satisfying meal.
Sautéing the Vegetables
Begin your Golden Curry by sautéing the foundational vegetables. Heat a generous amount of neutral oil in a large pot or Dutch oven over medium heat. Finely chopped onions are typically the first addition, cooked until translucent and softened – approximately 5-7 minutes.
Next, introduce sliced carrots, allowing them to cook alongside the onions for another 3-5 minutes, slightly tenderizing. Some recipes also include celery at this stage. Consistent stirring prevents sticking and ensures even cooking. The goal is to develop a subtle sweetness and soften the vegetables, creating a flavorful base for the curry.
Don’t rush this step; properly sautéed vegetables contribute significantly to the overall depth of flavor in your finished Golden Curry. A gentle, even heat is key to achieving the desired texture and taste.
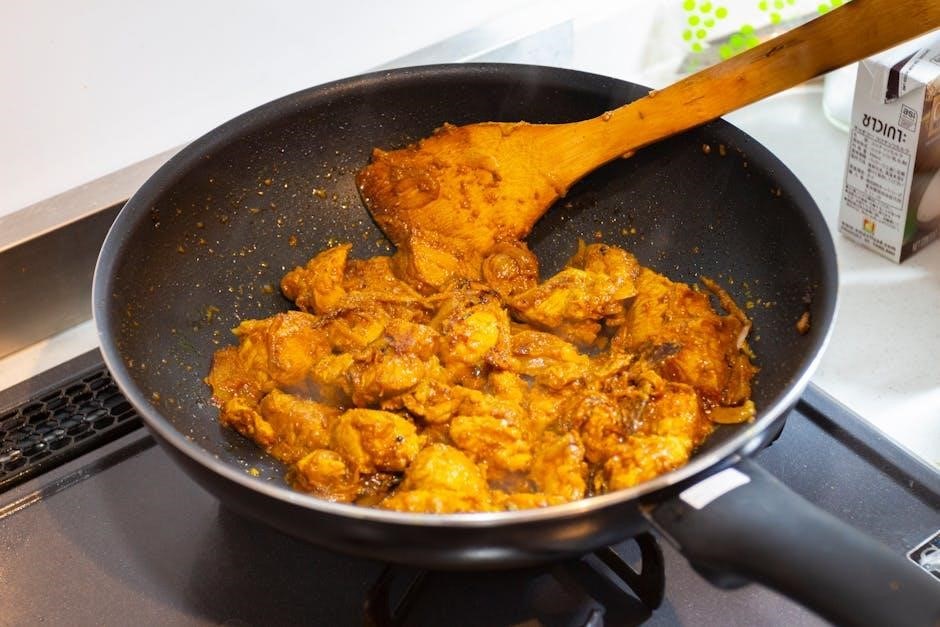
Adding the Protein and Browning
Once the vegetables are softened, it’s time to introduce your chosen protein – chicken thighs, pork shoulder, or beef are popular choices. Add the protein to the pot and increase the heat to medium-high. The key here is to achieve a good sear or brown on all sides.

Browning the protein isn’t just about aesthetics; it develops rich, savory flavors through the Maillard reaction. Work in batches if necessary to avoid overcrowding the pot, which can steam the protein instead of browning it. Season lightly with salt and pepper during this stage.
Ensure the protein is mostly cooked through, but it doesn’t need to be fully done at this point, as it will continue to cook during the simmering process. This step builds a robust foundation for your Golden Curry’s flavor profile.
Incorporating the Curry Roux
Now for the magic ingredient: the Golden Curry roux! Reduce the heat to low. Break the roux blocks into smaller pieces – this helps them dissolve more easily. Add the roux to the pot with the browned protein and vegetables.
Gradually stir the roux into the mixture, ensuring it fully dissolves into the liquid. This requires patience; avoid rushing the process. Continue stirring constantly to prevent sticking and ensure a smooth, lump-free sauce. The roux will begin to thicken the curry as it melts.
The amount of roux used determines the curry’s thickness and intensity of flavor. Follow the package instructions as a guide, but feel free to adjust to your preference. This step transforms the base into a fragrant, golden-hued curry.
Simmering and Thickening the Curry
Once the roux is fully incorporated, bring the curry to a gentle simmer. Reduce the heat to low, cover the pot, and let it simmer for at least 10-15 minutes, or longer for a richer flavor. Stir occasionally to prevent sticking and ensure even cooking.
As it simmers, the curry will continue to thicken. If it becomes too thick, add a little more water, a tablespoon at a time, until you reach your desired consistency. Conversely, if it’s too thin, continue simmering uncovered to allow more liquid to evaporate.
Taste and adjust seasonings as needed. Simmering allows the flavors to meld and deepen, creating a harmonious and satisfying curry. The longer it simmers, the more flavorful it becomes!
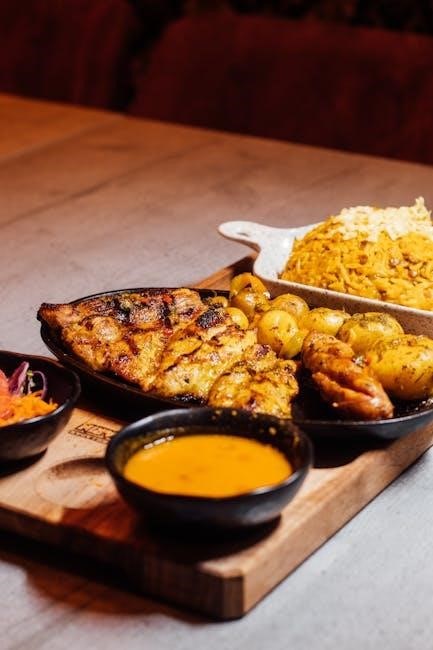
Serving and Enjoying Golden Curry
Serve your Golden Curry hot over fluffy rice, accompanied by pickled vegetables or a fresh salad for a complete and satisfying meal.
Customize the spice level to your liking and enjoy leftovers, easily reheated for a quick and flavorful experience.
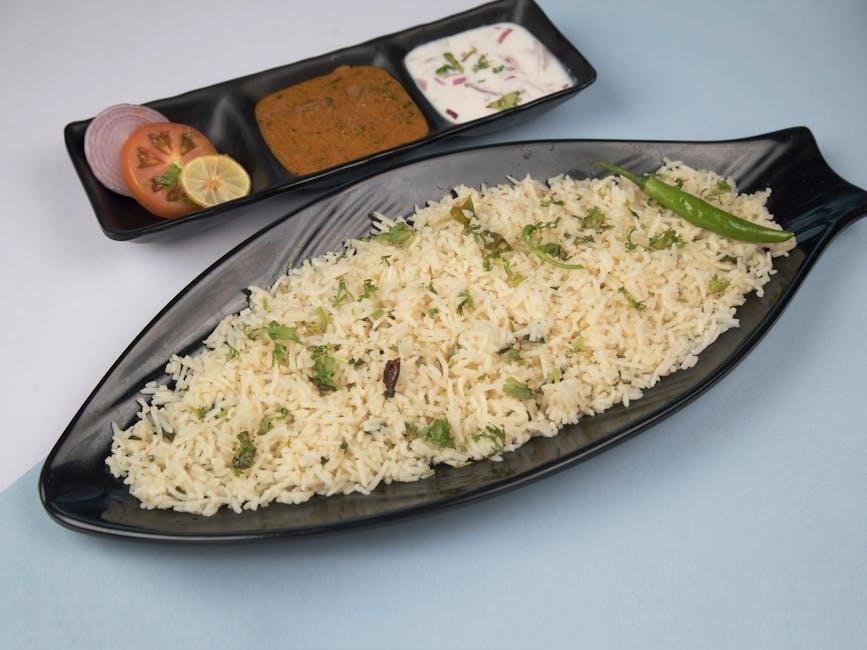
Serving Suggestions: Rice and Accompaniments
Golden Curry is traditionally served with steamed white rice, which acts as the perfect neutral base to absorb the rich and flavorful sauce. Japanese short-grain rice is ideal for its slightly sticky texture, allowing it to hold the curry beautifully. However, any type of rice you prefer will work wonderfully!
Beyond rice, consider complementary sides to enhance your meal. Fukujinzuke (pickled radish) and Rakkyo (pickled scallions) provide a refreshing, crunchy contrast to the curry’s warmth. A simple side salad with a light vinaigrette also cuts through the richness. For a more substantial accompaniment, steamed or stir-fried vegetables like broccoli or green beans add color and nutrients.
Don’t forget a sprinkle of finely chopped scallions or a dollop of Japanese mayonnaise (Kewpie) on top for added flavor and visual appeal. Enjoy!
Adjusting Spice Level
S&B Golden Curry roux comes in varying spice levels – mild, medium hot, and hot. Choosing the right level is key, but you can further customize the heat to your preference. For a milder curry, start with less roux than the package suggests, or mix mild and medium hot varieties. Conversely, for a spicier kick, use the hot variety or add a pinch of cayenne pepper or chili flakes during the simmering stage.
A small amount of grated ginger or a dash of chili oil can also subtly increase the heat. Remember to taste as you go! Adding a spoonful of yogurt or coconut milk can help balance the spice if it becomes too intense.
Ultimately, adjusting the spice level is about finding the perfect balance that suits your palate, ensuring a satisfying and enjoyable Golden Curry experience.
Leftover Storage and Reheating
Golden Curry actually tastes even better the next day as the flavors meld! Allow the curry to cool completely before storing it in an airtight container in the refrigerator. Properly stored, it will remain fresh for up to 3-4 days. For longer storage, freeze portions in freezer-safe containers for up to 2-3 months.
When reheating, gently warm the curry on the stovetop over medium heat, stirring occasionally to prevent sticking. Add a splash of water or broth if it becomes too thick. Alternatively, reheat individual portions in the microwave, stirring halfway through.
Avoid boiling the curry vigorously, as this can alter the texture. Reheated Golden Curry maintains its deliciousness, making it a convenient and satisfying meal option.
Troubleshooting Common Issues

Encountering issues? Adjust water levels for desired thickness. A little more water thins, while simmering uncovered thickens the Golden Curry to perfection!
Curry Too Thin?
Don’t despair if your Golden Curry lacks the desired thickness! Several simple solutions can quickly remedy this. The most common cause is insufficient roux – consider adding a half box of Golden Curry roux, ensuring it’s fully dissolved during simmering.
Alternatively, a cornstarch slurry (1 tablespoon cornstarch mixed with 2 tablespoons cold water) can be stirred in gradually while simmering. Simmering uncovered allows excess liquid to evaporate, naturally thickening the curry. Avoid adding flour directly, as it can create a pasty texture.
Remember, the curry will thicken as it cools, so avoid over-thickening initially. A longer simmering time, even after adding roux or slurry, often yields the best results. Patience is key to achieving the perfect consistency!
Curry Too Thick?
Encountering a Golden Curry that’s too thick is easily fixable! The primary solution is to add more liquid – water is the simplest, but broth (chicken, vegetable, or beef) will enhance the flavor profile. Add liquid gradually, about ¼ cup at a time, stirring continuously to prevent lumps.
Avoid adding a large amount of liquid at once, as this can dilute the curry’s rich flavor. If you’ve used a slurry to thicken, remember it continues to thicken as it cools. Simmering for a shorter duration can also help prevent excessive thickening.
For a subtle flavor boost, consider a splash of coconut milk or even a bit of apple juice. Consistent stirring is crucial while adjusting the consistency to ensure a smooth, even texture.