
Hopkins Agility offers proportional braking control, ensuring smooth and safe towing experiences for various electric trailer brakes and systems.
This controller is designed for easy installation, providing drivers with enhanced control and confidence while hauling trailers.
It’s a vital component for anyone needing to safely operate a vehicle with a trailer, offering a user-friendly interface and reliable performance.
What is an Electric Brake Controller?
An electric brake controller is a crucial safety device installed within a tow vehicle, designed to synchronize the vehicle’s braking system with the electric trailer brakes. Unlike the vehicle’s hydraulic brakes, trailers utilize an electrical signal to activate their braking mechanisms. The controller translates the driver’s braking input into an appropriate electrical current sent to the trailer brakes.

Without a controller, the trailer’s brakes won’t function in harmony with the tow vehicle, potentially leading to dangerous situations like trailer sway, extended stopping distances, and loss of control. The Hopkins Agility, specifically, is engineered to provide proportional braking, meaning the trailer brakes apply with the same intensity as the tow vehicle’s brakes, offering a more natural and controlled stopping experience.
It’s important to note that this type of controller is specifically for electric systems and isn’t compatible with electric-hydraulic setups without appropriate adapters or alternative controllers.
Hopkins Agility: Key Features and Benefits
The Hopkins Agility stands out due to its user-friendly design and advanced functionality. A primary benefit is its proportional braking, delivering smooth and controlled stops by mirroring the tow vehicle’s deceleration. The integrated display provides real-time voltage readings, crucial for diagnosing potential issues within the trailer brake system.
Furthermore, the Agility features a manual override function, allowing drivers to independently apply the trailer brakes for enhanced control in challenging situations. Its compact size and straightforward installation process make it accessible for both DIY enthusiasts and professional installers.
The controller is designed to work with both electric trailer brakes and electric-hydraulic systems, offering versatility. It’s a reliable solution for ensuring safe and efficient towing, backed by a limited lifetime warranty, providing peace of mind for users.

Installation Process
Proper installation of the Hopkins Agility requires careful attention to wiring and secure mounting, ensuring optimal performance and safe operation of your trailer brakes.
Tools Required for Installation

Before beginning the installation of your Hopkins Agility Trailer Brake Controller, gathering the necessary tools is crucial for a smooth and efficient process. You will need a standard screwdriver set, including both Phillips head and flathead options, to handle various screws encountered during mounting and wiring.
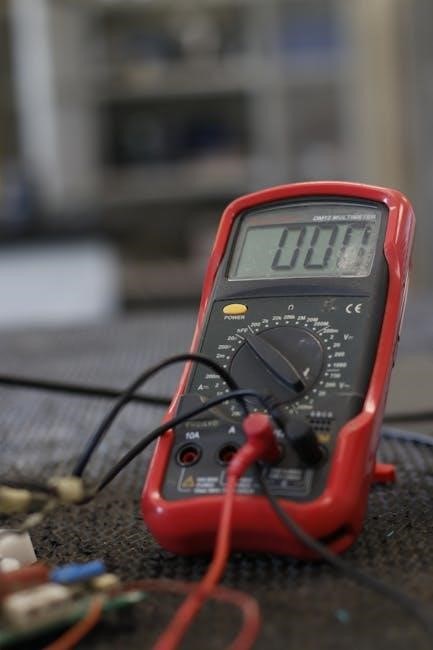
A wire stripper/crimper is essential for preparing and connecting the wires correctly, ensuring secure and reliable connections. Pliers, both standard and needle-nose, will be helpful for manipulating wires and securing connections in tight spaces. A multimeter is highly recommended for testing voltage and continuity, verifying proper wiring and functionality.
Additionally, you may require a drill with appropriate drill bits for mounting the controller securely to the vehicle’s dashboard or a suitable location. Electrical tape will be needed for insulating connections, and zip ties can help manage and organize the wiring harness. Finally, having a flashlight or work light will improve visibility, especially when working in dimly lit areas under the dashboard.
Wiring the Agility Controller
Proper wiring is paramount for the correct operation of the Hopkins Agility. Begin by locating your vehicle’s brake wiring, typically found behind the dashboard. The controller requires connections for power, ground, and the brake signal wire. Ensure the vehicle is completely powered off before commencing any wiring work.
Connect the red wire from the controller to a 12V power source, ideally one that is switched – meaning it only receives power when the ignition is on. The white wire should be connected to a solid ground. The blue wire is the brake signal wire and must be connected to the vehicle’s brake light circuit.
Carefully follow the installation guide, as incorrect wiring can damage the controller or vehicle’s electrical system. A wiring upgrade may not resolve low voltage readings during heavy braking, indicating a potential issue with the trailer brakes themselves.
Identifying Vehicle Brake Wiring
Locating the vehicle’s brake wiring is a crucial first step. Typically, this wiring is found behind the dashboard, often bundled with other electrical connectors. You’ll need to identify the wire that activates when the brake pedal is pressed – this is your brake signal wire.
A multimeter is an invaluable tool for this process. With the ignition on and the brake pedal depressed, test each wire until you find the one that shows 12V. This confirms it’s the brake signal wire. Be cautious and avoid damaging other wires during identification.

Consult your vehicle’s wiring diagram if available, as wire colors can vary between manufacturers and models. Remember to disconnect the negative battery terminal before starting any electrical work to prevent shorts and ensure safety. Accurate identification is key for proper controller function.
Connecting to the Trailer Connector (7-Way)
The 7-way connector is the standard for connecting the controller to the trailer’s electric brakes. Locate the 7-way connector on your vehicle, typically in the rear bumper area. Ensure it’s clean and free of corrosion for a reliable connection.
The blue wire in the 7-way connector is dedicated to the trailer brake signal. Connect the corresponding blue wire from the Agility controller to this connector pin. A secure and properly crimped connection is vital to prevent intermittent braking or complete failure.
Double-check all connections to ensure they are tight and insulated. Use dielectric grease to protect against corrosion. Proper connection to the 7-way ensures the controller can effectively communicate with and control the trailer’s braking system, enhancing safety during towing.
Mounting the Controller
Proper mounting of the Hopkins Agility is crucial for both functionality and safety. Select a location that is easily accessible to the driver, yet doesn’t interfere with legroom or vehicle operation. Common locations include under the dash or on the steering column.
Consider the angle of the controller; it should be positioned for optimal visibility of the display. Use the provided mounting bracket and screws to secure the unit firmly to the vehicle’s interior. Ensure the screws are appropriate for the mounting surface to prevent loosening during travel.
Avoid mounting the controller in areas exposed to excessive moisture or direct sunlight. A stable and secure mount prevents damage and ensures reliable operation of the braking system while towing.
Optimal Placement and Angle
When choosing a location for your Hopkins Agility, prioritize accessibility and clear visibility. Under the dash, within easy reach, is a popular choice, but ensure it doesn’t obstruct legroom or vehicle controls. Mounting on the steering column is also viable, offering a direct line of sight.
The angle is equally important. Position the controller so the display is easily readable at a glance, minimizing driver distraction. A slight upward tilt often works best. Avoid angles that cause glare from sunlight or reflections from interior lights.
Consider the natural hand position while driving; the controller should be reachable without excessive stretching. A comfortable and intuitive placement enhances safety and ease of use during towing.
Securing the Controller to the Vehicle
Once you’ve determined the optimal placement, securely mounting the Hopkins Agility is crucial. Most kits include mounting brackets and screws designed for common vehicle dashboards. Ensure the surface is clean and free of debris before attaching the bracket.
Use the provided screws, selecting a length appropriate for your dashboard’s thickness. Avoid over-tightening, which could damage the dash or strip the screw holes. For added stability, consider using a small amount of thread locker on the screws.
Double-check that the controller is firmly attached and doesn’t wobble during driving. A secure mount prevents damage to the unit and ensures reliable operation. Proper installation contributes significantly to a safe towing experience.

Operation and Settings
The Hopkins Agility features an intuitive display for adjusting brake sensitivity and utilizing a manual override function, providing tailored control during towing operations.
Understanding the Display
The Hopkins Agility’s display is central to understanding its operation and ensuring optimal trailer braking performance. The display provides crucial information regarding the voltage being sent to the trailer brakes, typically showing readings between 0 and 12 volts. A low voltage reading, such as 20-30 volts during heavy braking, can indicate a wiring issue or a problem with the trailer brakes themselves, rather than the controller.
It’s important to monitor these readings to confirm the controller is functioning correctly and delivering adequate power. The display also indicates the level of braking force being applied, allowing the user to adjust sensitivity settings for different trailer weights and road conditions. Familiarizing yourself with the display’s indicators is key to safe and effective towing, ensuring responsive and controlled braking whenever needed.

Adjusting Brake Sensitivity
The Hopkins Agility allows for precise adjustment of brake sensitivity to match varying trailer weights and driving conditions. This is crucial for achieving optimal braking performance and preventing issues like trailer sway or premature brake wear. The controller utilizes proportional braking, meaning the braking force applied to the trailer is directly related to the deceleration of the tow vehicle.
Adjusting the sensitivity involves fine-tuning the controller’s response to the brake pedal. Higher sensitivity settings provide quicker and more aggressive braking, suitable for heavier loads or slippery conditions. Conversely, lower settings offer a smoother, more gradual braking experience, ideal for lighter trailers or dry pavement. Experimentation and careful observation are key to finding the optimal setting for your specific setup, ensuring safe and controlled towing.
Manual Override Function
The Hopkins Agility features a manual override function, a critical safety feature allowing drivers to independently apply the trailer brakes. This is particularly useful in emergency situations or when the trailer’s brakes are malfunctioning. Activating the manual override provides immediate braking force to the trailer, regardless of the tow vehicle’s braking status.
To engage the manual override, typically a dedicated button or lever on the controller is pressed or pulled. This bypasses the proportional braking circuit and directly activates the trailer brakes. It’s essential to understand that using the manual override can cause abrupt stopping, so it should only be employed when necessary. Releasing the override returns control to the proportional braking system, resuming normal operation. Familiarize yourself with its location and operation before towing.

Troubleshooting Common Issues
Addressing issues like low voltage readings, unresponsive controllers, or brake lock-up is crucial for safe towing; proper diagnosis ensures optimal Agility performance.
Low Voltage Readings
Experiencing low voltage readings on the Hopkins Agility controller can indicate several potential problems within the electrical system. A reading of only 20-30 volts during heavy braking, despite a properly functioning system, suggests the issue isn’t related to a simple wiring upgrade.
First, verify the vehicle’s charging system is functioning correctly. A weak battery or failing alternator can contribute to low voltage at the controller. Second, inspect all wiring connections – from the battery to the controller and then to the trailer connector – for corrosion, looseness, or damage. Ensure all grounds are clean and secure.
Consider the wire gauge used for the connection. Insufficiently sized wires can cause voltage drop, especially over longer distances. Finally, if the problem persists, the controller itself might be faulty and require professional evaluation or replacement. Remember, the controller is designed for electric trailer brakes.
Controller Not Responding
If your Hopkins Agility trailer brake controller isn’t responding, several troubleshooting steps can help identify the issue. Begin by checking the power supply to the controller; ensure it’s receiving voltage from the vehicle’s electrical system. Verify the inline fuse protecting the controller hasn’t blown – this is a common cause of complete failure.
Next, inspect all wiring connections, paying close attention to the ground connection. A loose or corroded ground can prevent the controller from powering on. Confirm the controller is properly mounted and that no wires have become disconnected during vehicle operation.
If the controller still doesn’t respond, it may indicate an internal fault within the unit itself. In such cases, professional diagnosis or replacement of the controller might be necessary. Remember to consult the installation guide for specific wiring diagrams and troubleshooting tips.
Brakes Locking Up
If your trailer brakes are locking up with the Hopkins Agility controller, it usually indicates excessive braking force being applied. The first step is to reduce the brake sensitivity setting on the controller itself. Lowering the sensitivity will decrease the amount of power sent to the trailer brakes, preventing them from locking during normal stops.
Inspect the trailer brakes for any mechanical issues, such as sticking calipers or improperly adjusted brakes. Ensure the trailer tires are properly inflated, as uneven tire pressure can contribute to brake lockup. A wiring issue causing a constant voltage to the brakes is also a possibility; check connections.
If the problem persists, consider a professional inspection of the trailer brake system. Avoid aggressive braking until the issue is resolved to prevent loss of control.

Warranty Information
Hopkins Manufacturing Corporation provides a Limited Lifetime Warranty on the Agility Electric Brake Controller against defects in materials and workmanship. This warranty covers the repair or replacement of defective parts, at Hopkins’ discretion, for the original purchaser.
However, the warranty does not cover damage resulting from misuse, abuse, improper installation, accidents, or normal wear and tear. Modifications to the controller will void the warranty. Proof of purchase is required for all warranty claims.
Hopkins is not liable for any consequential damages, including labor costs associated with installation or removal. For warranty service, contact Hopkins Manufacturing Corporation directly with details of the issue and proof of purchase.
See full warranty details in the documentation included with your controller.